¶ Important note
Do not extract or run the game as the root user. It's considered very unsafe, and you will have permission issues.
¶ Determining what version to download
There are multiple versions for linux setups. Use uname -a in a terminal to find out what to download.

For example, the above output says x86_64, so the amd64 download would be used. (amd64 legacy would be used on older systems/linux distributions)
Raspberry Pi users would use arm64v8 if uname shows "aarch64", while arm32v7 would be used if uname has "armv7" in it.
¶ Installing the game
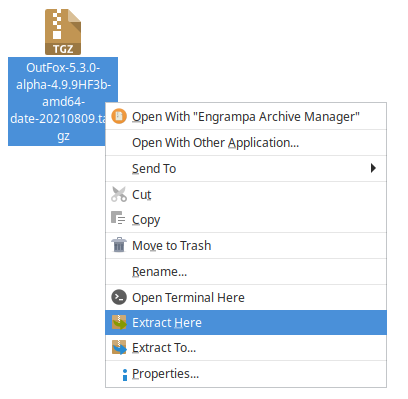
Project OutFox is currently distributed as .tar.gz files for linux distributions.
Most distributions have a right click item in their file manager for extracting archives.
If the menu doesn't have an option to extract the archive, open the file in your archive manager and extract it to somewhere convenient. (ex: the user's home or Desktop directory)
Open a terminal and get to the directory the archive is in.
Run this in your terminal, replacing the name of the archive file with what you named it.
tar -xvf OutFox-5.3.0-alpha-4.9.9HF3b-amd64-legacy-date-20210809.tar.gz
This should create a directory that holds the install of Project OutFox.
¶ Portable vs Non-portable mode
When booting, the game looks for a file in its' root directory called portable.ini. If this file is found, the game switches to "portable" mode, which has all save data placed in the program's root directory.
Otherwise, the save data will be placed in .project-outfox in the user's home directory.
¶ Running the game
The following is an example launcher file named "Project OutFox.desktop".
Create a file on the desktop with this name and base the contents on the section below.
#!/usr/bin/env xdg-open

[Desktop Entry]
Type=Application
Name=Project OutFox
Icon=/home/mtk/Desktop/Icons/dance_icon.png
Exec=/home/mtk/Desktop/OutFox/outfox
Note that the Exec line is a full path to the OutFox executable, while the Icon line can be a full path to any png on the system.
Once created, the launcher can be double-clicked to run the game.
In the game's root directory, type this into the terminal and press enter:
./outfox
This will start the game and have some extra output in the terminal that is usually seen in the logs.
To force a theme, run the following, replacing the theme name with the desired theme's directory name.
./outfox --theme=SM5-GrooveNights
¶ Extra NoteSkins
The NoteSkinsSM5 directory in Appearance contains the noteskins that came with StepMania 5.1/5.0.12. The contents can be dragged into the NoteSkins directory if one wants to use the old noteskins.
¶ Common problems
¶ Missing libraries
The game might not launch if libraries are missing. ldd can be used to help determine what packages need to be installed without having to run the game multiple times.
Run this in the game's directory from a terminal to find what libraries are missing:
ldd outfox
Here is example output from ldd:

In this example, libbz2.so.1.0 is missing.
Here's a list of what libraries it looks for and what Debian/Ubuntu/Fedora package it corresponds to. Most systems should have most of these already.
| Library name | Debian/Ubuntu package | Fedora package |
|---|---|---|
| libOpenGL.so.0 | libopengl0 | libglvnd-opengl |
| libGLX.so.0 | libglx0 | libglvnd-glx |
| libasound.so.2 | libasound2 | alsa-lib |
| libjack.so.0 | libjack-jackd2-0 | jack-audio-connection-kit or pipewire-jack-audio-connection-kit |
| libpulse.so.0 | libpulse0 | pulseaudio-libs |
| libbz2.so.1.0 | libbz2-1.0 | bzip2-libs |
| libusb-1.0.so.0 | libusb-1.0-0 | libusb1 or libusbx |
| liblzma.so.5 | liblzma5 | xz-libs |
| liblz4.so.1 | liblz4-1 | lz4-libs |
| libFLAC.so.8 | libflac8 | flac-libs |
| libogg.so.0 | libogg0 | libogg |
| libvorbis.so.0 | libvorbis0a | libvorbis |
| libvorbisenc.so.2 | libvorbisenc2 | libvorbis |
¶ Audio not playing / going to the wrong device
Be sure to check the SoundDevice preference.
When the game boots, it writes the available audio devices into the logs and terminal output.

Assuming the third device is where the audio should be, the whole line for SoundDevice should be SoundDevice=plughw:1,3.
¶ Needing to force ALSA instead of PulseAudio.
A wrapper program called pasuspender can be used to temporarily disable pulseaudio and make OutFox use the ALSA drivers.
In the terminal, it would be used like this:
pasuspender ./outfox
¶ Needing to force a different audio driver
Be sure to check the SoundDriver preference for forcing the audio driver.
Here's what can be put into the preference, and what it means
| Preference setting | Audio Driver |
|---|---|
| Pulse | PulseAudio |
| ALSA-sw | ALSA, software renderer. |
| JACK | JACK |
| Null | No audio |
¶ Arcade Machine Conversion With Pi
¶ LITBoard/Arduino Instructions
In the terminal, navigate to the /Data folder of your Outfox installation.
example: cd /home/pi/Desktop/OutFox/Data
Create a FIFO file that Outfox will write to:
mkfifo "StepMania-Lights-SextetStream.out"
Ensure this FIFO file has the proper read/write permissions as the same account running Outfox.
Next, navigate to the Outfox save folder. In most cases, this will be in your home directory and be something like .project-outfox:
cd /home/pi/.project-outfox
Open up "Preferences.ini":
nano Preferences.ini
Scroll down to find a line that starts with LightsDriver= and change it to:
LightsDriver=SextetStreamToFile
Press crtl+o and hit return, then press ctrl+x to save the file and exit nano. We need to now make sure that something is going to use that file, otherwise you'll find your system will eventually crash as that file fills up without getting emptied.
Make sure that socat is installed on your pi:
sudo apt install socat
Next open up cron to have socat start at reboot by typing:
crontab -e
At the end of that window, add this line (replacing the path with the path to you FIFO file):
@reboot socat "/home/pi/Desktop/OutFox/Data/StepMania-Lights-SextetStream.out" /dev/ttyUSB0,raw,echo=0,b155200 &
Press crtl+o, return, ctrl+x to save and exit crontab. Notice the & at the end of the line. That's important to let it run in the background. Otherwise your system will just sit there waiting for it to quit...
Next, create a launcher file that will run on startup. In order to do this, it should reside in the autostart folder of xdg. Easy way to do this is:
nano /etc/xdg/autostart/OutFox.desktop
When nano opens, put the following into the text file:
#!/usr/bin/env xdg-open

[Desktop Entry]
Type=Application
Name=Project OutFox
Exec=/home/pi/Desktop/OutFox/outfox
Ctrl+o, return, ctrl+x to save and exit the file. Make sure you also give it executable permission:
chmod a+x /etc/xdg/autostart/OutFox.desktop
Now if you reboot the pi, it should automatically load socat and OutFox for a session of great fun.
(thanks to Random Hajile for the PiCab information)