Dependant of ScreenWithMenuElements.
This page is still in progress!
This screen is responsible for creating the OptionRow, which is a user-controlled actor that allows them to choose options and enter submenus.
¶ Available Metrics
These are the available metrics that are exclusive to this screen. Any extra metrics seen are inherited from the parent actor this screen is derived from ( ScreenWithMenuElements ) .
| Title | Default Value | Description |
|---|---|---|
| SaveOnExit | false | Tells the game to save options upon exiting the screen. Note that this is done when the players hit the "EXIT" button at the bottom of the list, NOT when they back out with Back or ESC. |
| NavigationMode | OptionsNavigationMode() | Determines the kind of navigation. Two possible values are available: "normal" or "toggle". More is discussed in Menu Navigation. |
| InputMode | "individual" | Sets the kind of input for each player. Two possible values are available: "individual" or "together". More is discussed in Menu Navigation. |
| ForceAllPlayers | false | Forces all players to join if set. |
¶ Menu Navigation
Screenshots shown for this demonstration are made with a completely blank theme to avoid confusion with extra items. In this example, the ScreenPlayerOptions screen is shown.
By default, the game will provide you with a 5-button individual navigation mode, which means that the menu is controllable with all general gameplay buttons: Up, Down, Left, Right and Start. This is recommended to easier navigation.
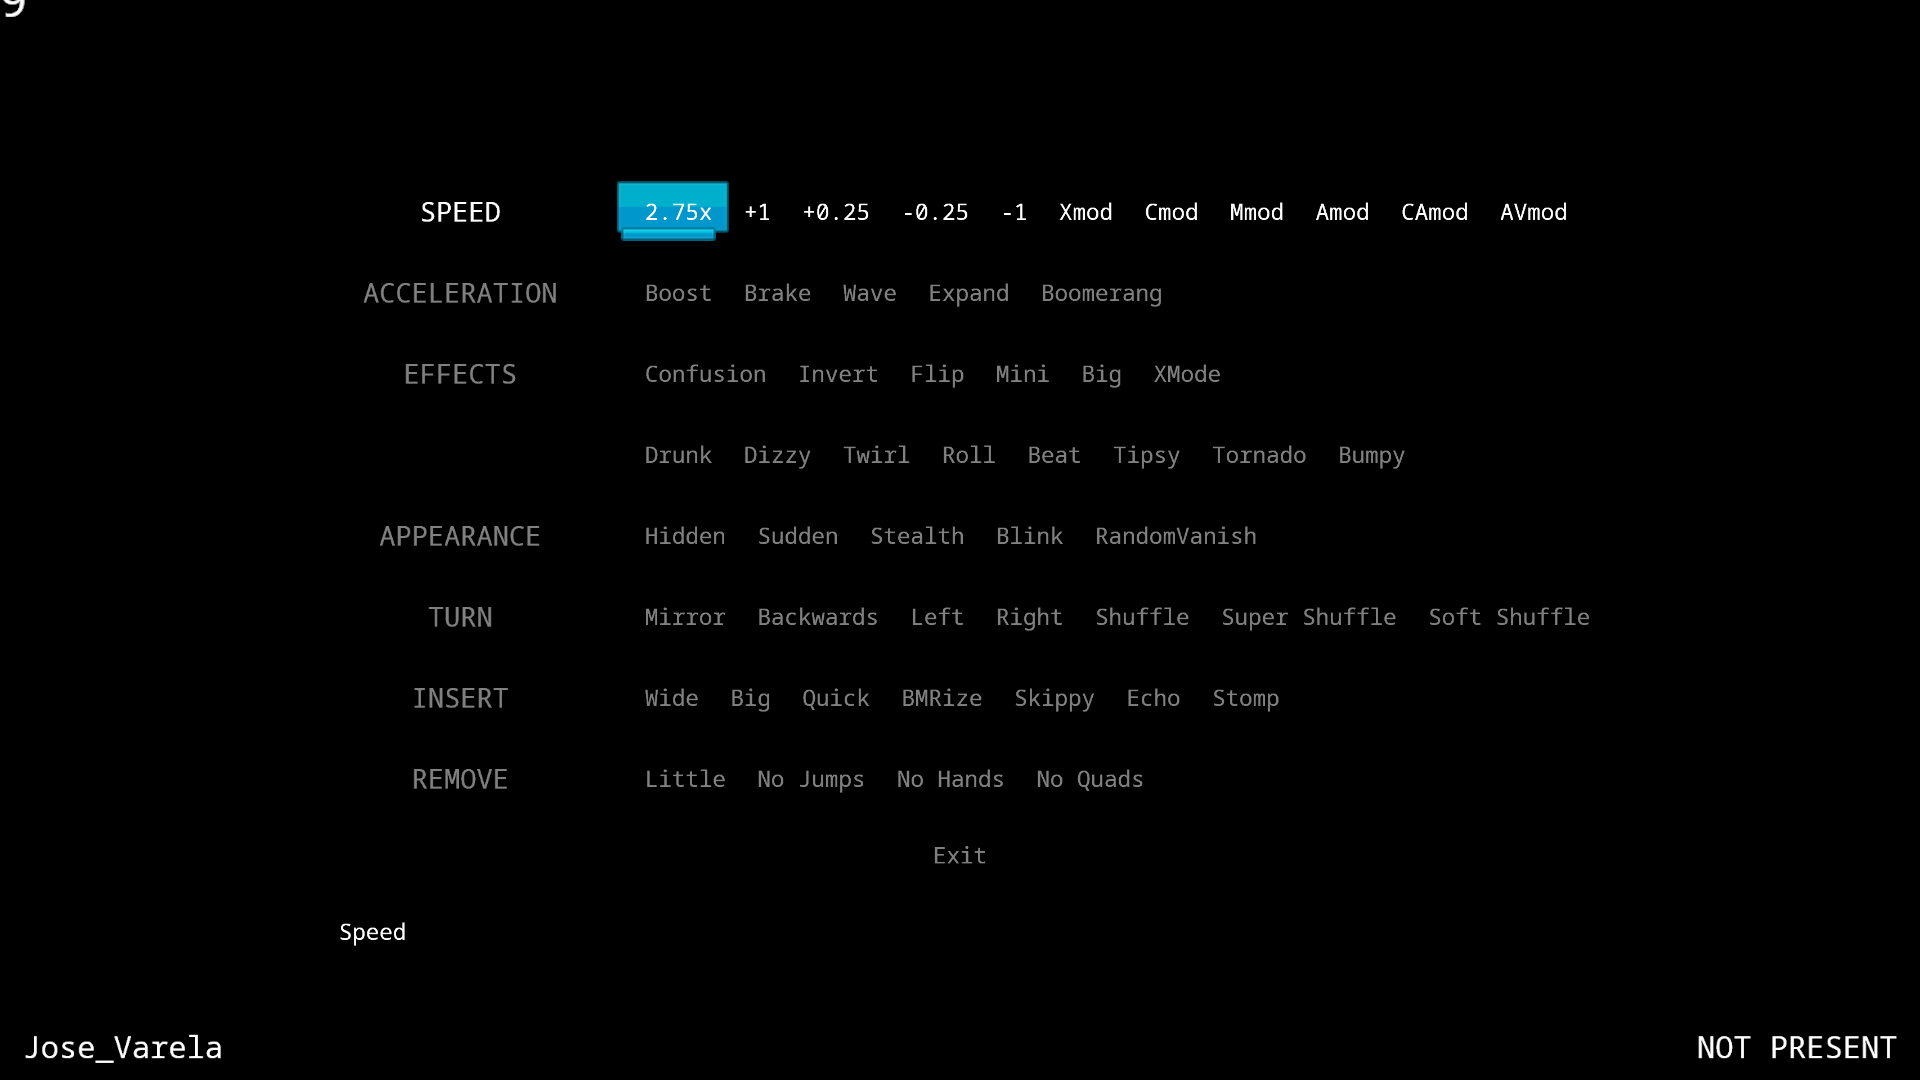
This example shows the screen with the
NavigationModeset tonormal.
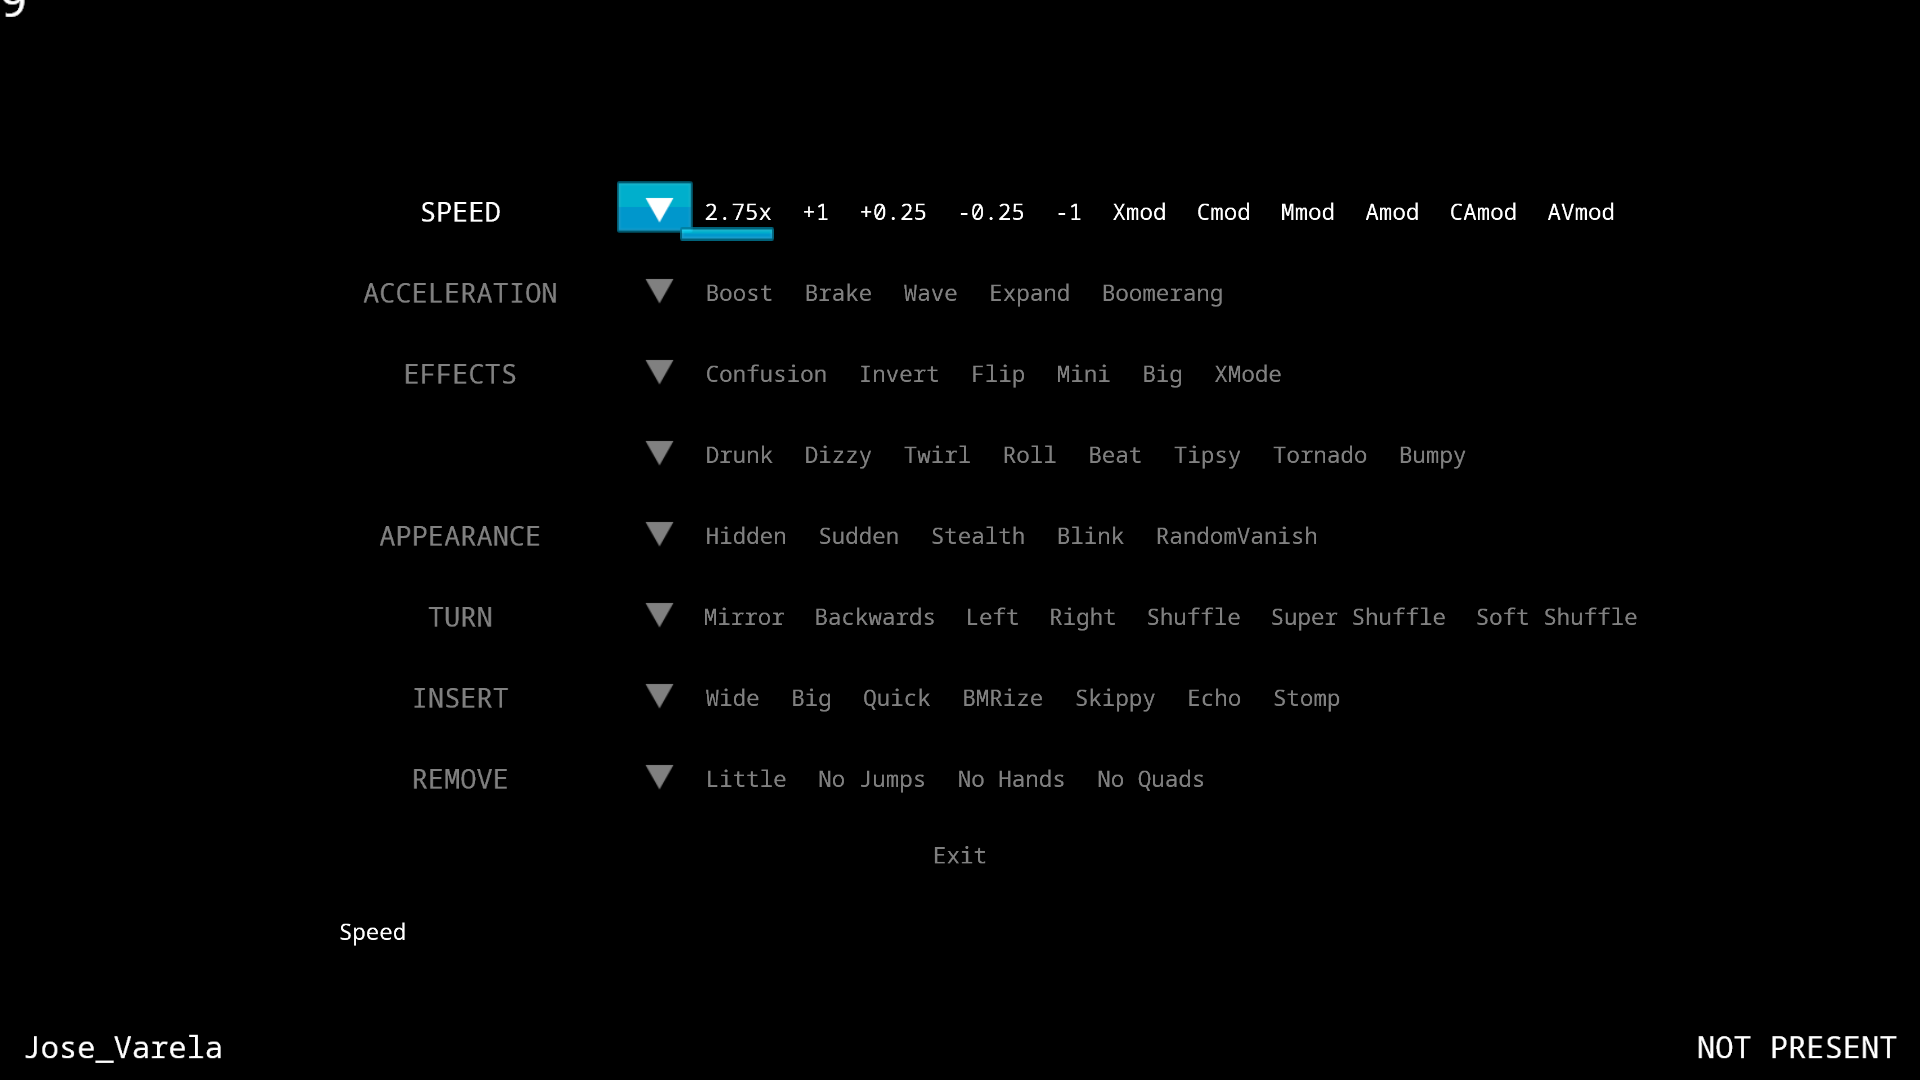
However, if the need requires to use the classic 3-button navigation mode where movement was performed only using Left, Right and Start, you can switch the NavigationMode metric to toggle. This brings back the "Scroll Down" button, located on the start of every row, which allows you to move to the next row without modifying values.
If the
NavigationModeis set totoggle, you may notice that the "Scroll Down" may not show up. This is due to the game checking for a preference calledArcadeOptionsNavigation(Otherwise known as Options Navigation in Input Options).
Unless this preference is set to "Arcade Mode" it will not apply the "Scroll Down" button.
It is worth noting that the game automatically determines which navigation mode to use by default based on the "Three-Key Navigation" metric and option located in Input Settings via a function. This can of course be overwritten with the options listed on Available Metrics.
[ScreenOptions]
NavigationMode=OptionsNavigationMode()
¶ Controlling the OptionRow
As mentioned at the start, this screen makes use of an OptionRow to show and control the options. This screen calls the actor "Row", thus its metrics begin with the prefix "Row".
NumRowsShown=8
RowInitCommand=
RowOnCommand=
RowOffCommand=
RowPositionTransformFunction=function(self,offsetFromCenter,itemIndex,numItems) self:y(SCREEN_CENTER_Y-146+36*offsetFromCenter) end
By default, the game renders 8 rows at once. Any more are obscured until the user approaches the option.
All positions are controlled via its TransformFunction, which is a Lua function that determines how each row will be positioned at absolute space. Let's use the default value as an example.
RowPositionTransformFunction=function(self,offsetFromCenter,itemIndex,numItems) self:y(SCREEN_CENTER_Y-146+36*offsetFromCenter) end
The function provides four arguments:
self: The row itself for that line.offsetFromCenter: the offset for that row from the center row. So the top row is given a number of 0, and any rows below it increase this number.itemIndex: the index of that row. It doesn't get affected in real-time likeoffsetFromCenter.numItems: The total amount of items in this OptionRow.
For the function then, we are doing the following (This will be done step-by-step for easier deduction):
- We're setting a y function that positions the list in a vertical position, which starts at
SCREEN_CENTER_Y-146.
This will cause the items to start at the top of screen, but are all stuck together, as there is no variable telling them how far apart they should be from each other.
- To separate each item vertically, we'll use the
offsetFromCenterargument, to tell it to separate by 36 pixels (36*offsetFromCenter).
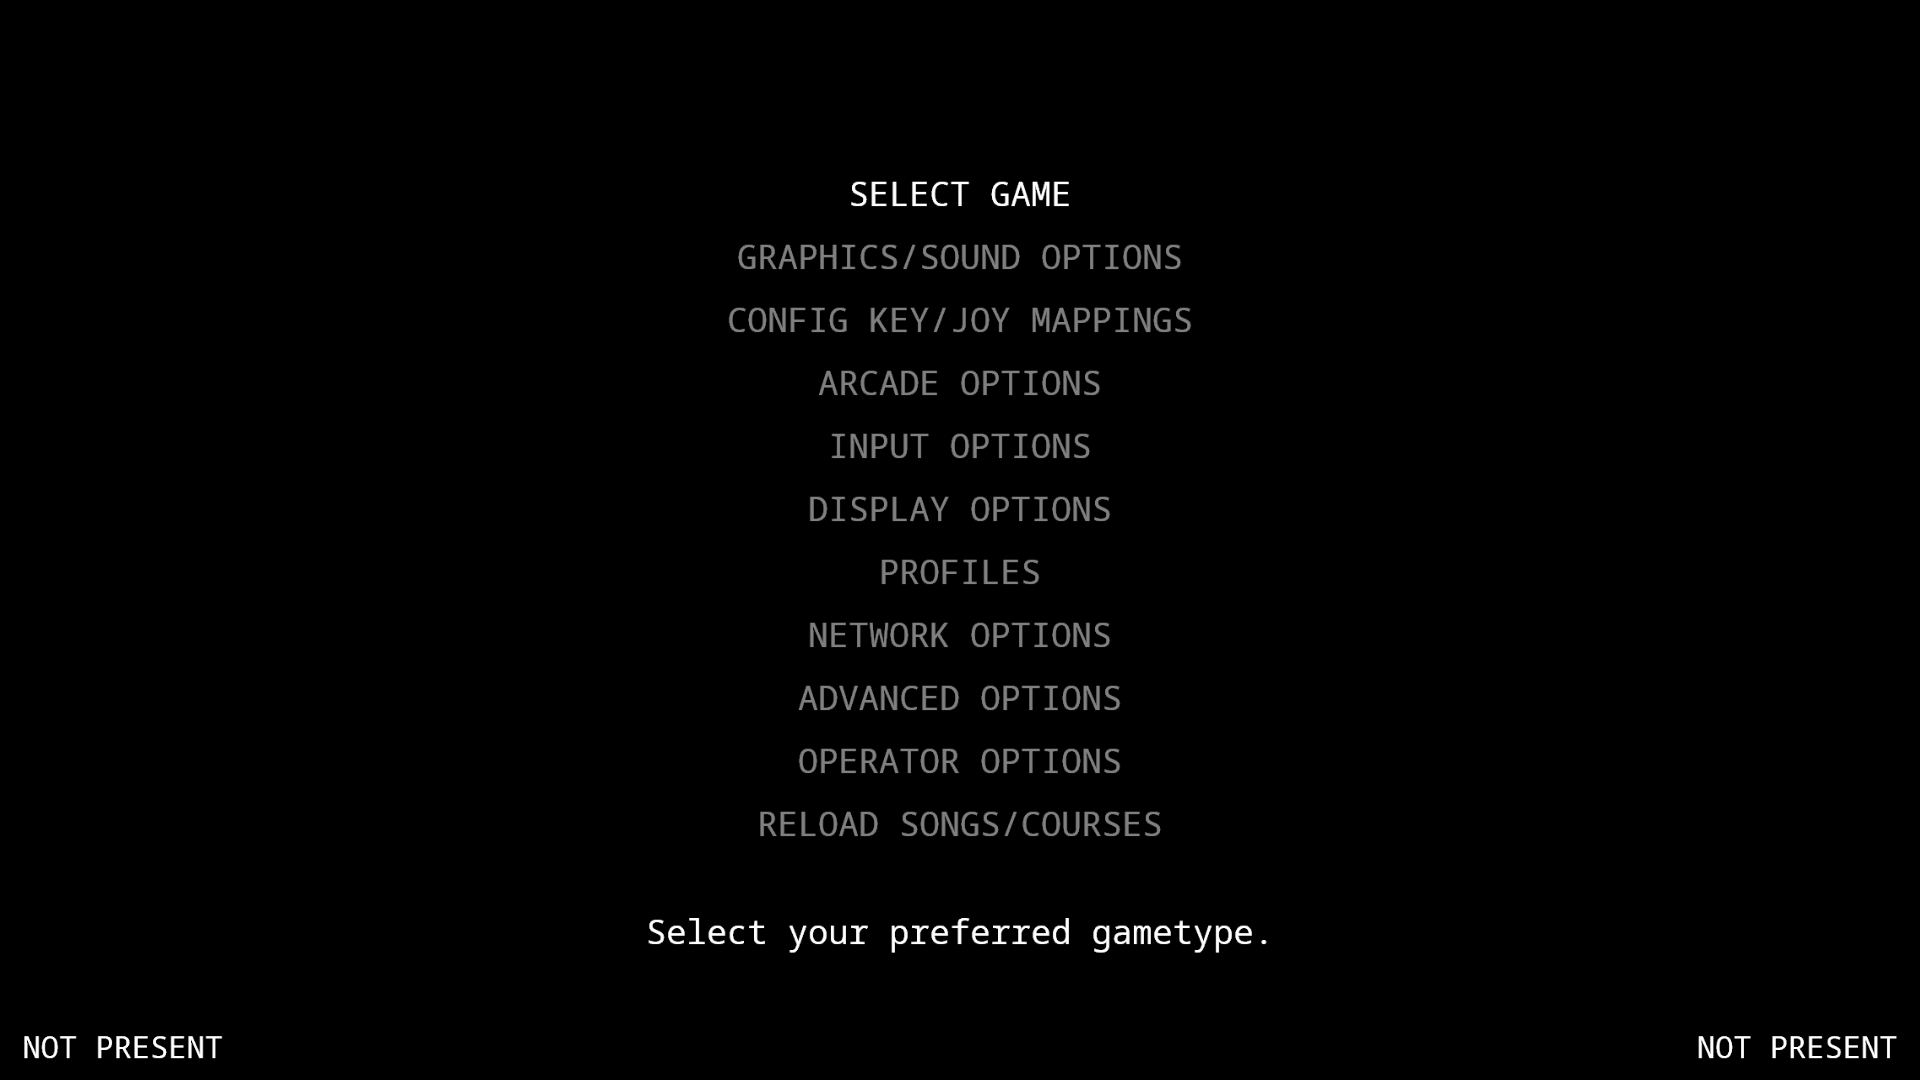
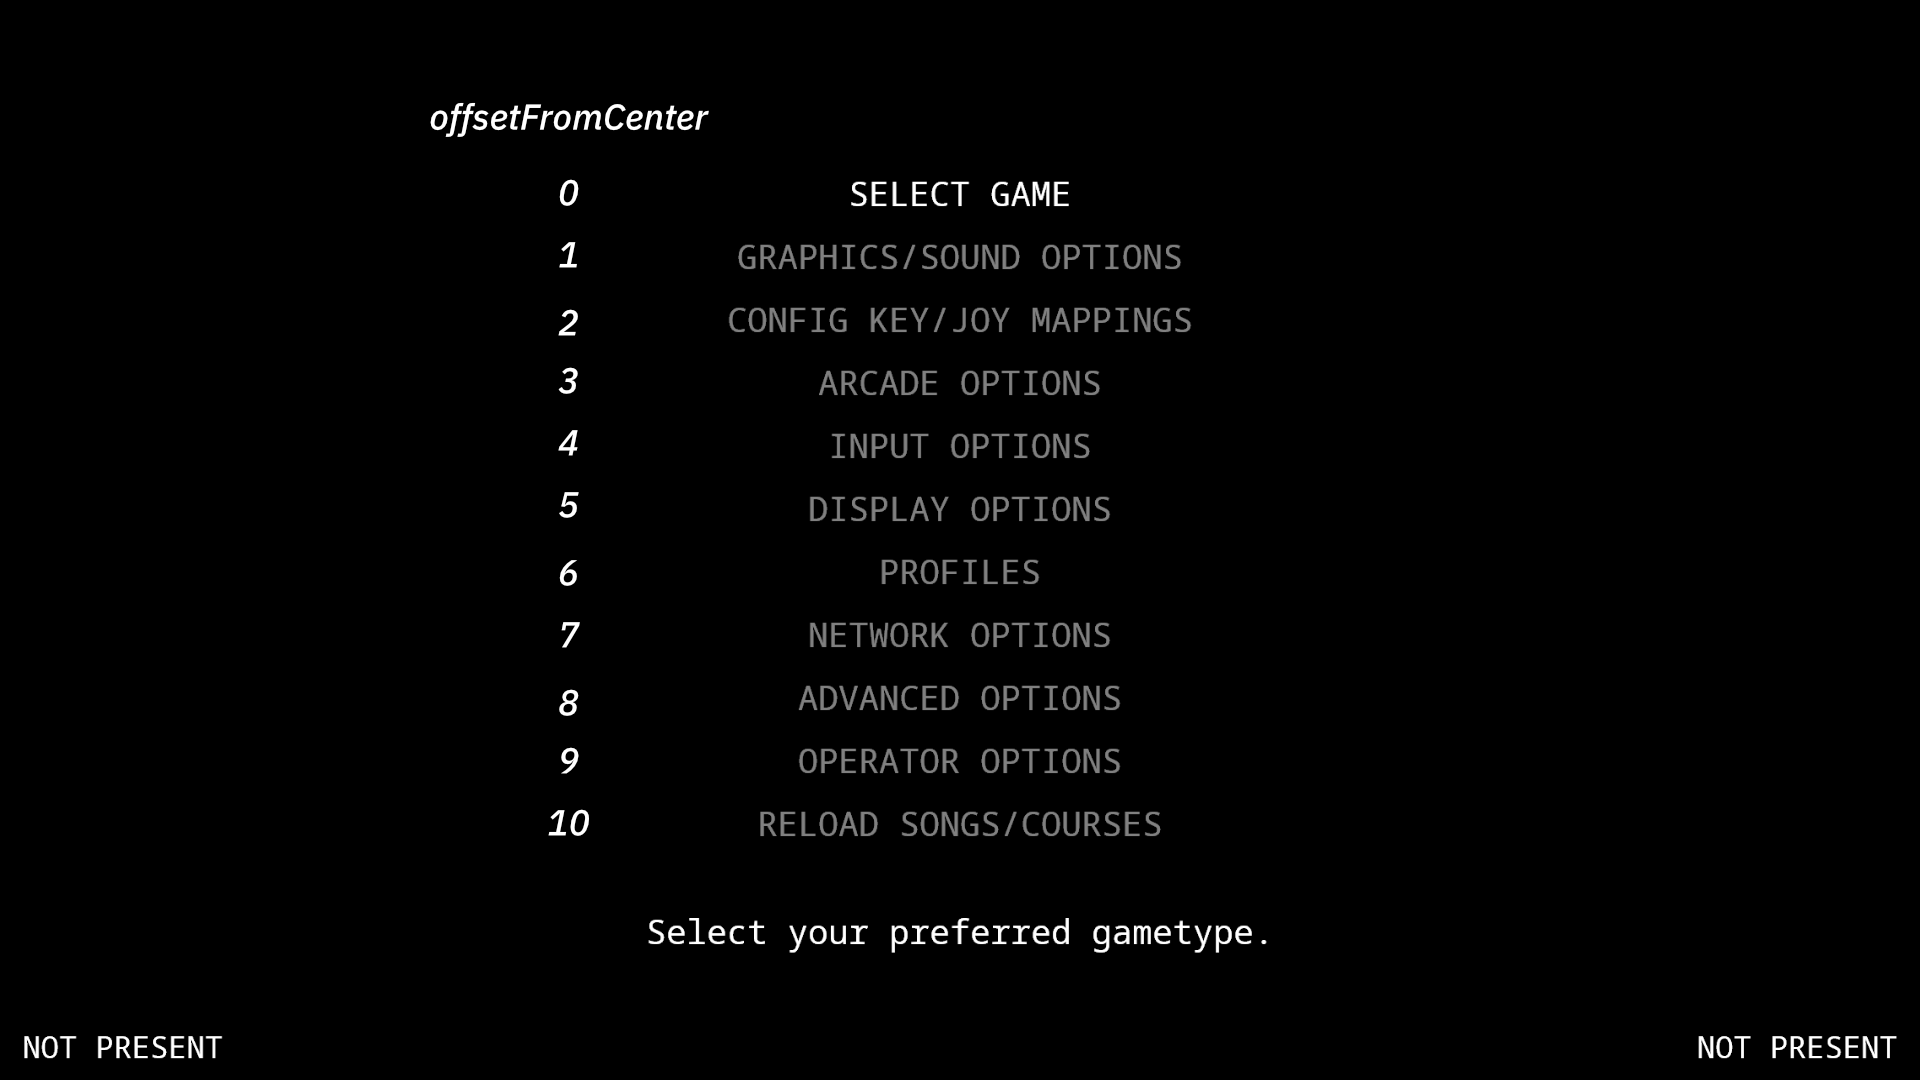
Now, the OptionRow shows each option properly, with nice separation between each line, which is automatically sorted based on the center offset. Here's an image detailing how the center offset is set and the spacing of each item, each offset is positive, starting from 0 with "Select Game". Here, it goes from 0 to 10, as ScreenOptionsService has set its NumRowsShown metric to 11.
¶ Explanation Text
The text shown at the bottom of the example is the explanation text. If available, the game will read the description of that text based on the row's name located in [OptionDescriptions] and output it to this text actor.
This explanation text can easily be toggled with the following metric:
ShowExplanations=true
There are two kinds of explanation text, Player based and Together. Player based are explanation text that follow the player's cursor to show information and is located on each player's side. Together is a shared explanation actor instead, meant to be used in general menus that don't rely on players (like the example above).
When a screen uses player based explanations, the metrics for these are the following, appending the player enumator at the end of the Explanation prefix:
ExplanationP1X=SCREEN_CENTER_X-256-20
ExplanationP1Y=SCREEN_CENTER_Y+174
ExplanationP1OnCommand=shadowlength,1;wrapwidthpixels,256/0.5;zoom,0.5;halign,0;cropright,1;linear,0.5;cropright,0
ExplanationP1OffCommand=
ExplanationP2X=SCREEN_CENTER_X+256+20
ExplanationP2Y=SCREEN_CENTER_Y+174
ExplanationP2OnCommand=shadowlength,1;wrapwidthpixels,256/0.5;zoom,0.5;halign,1;cropright,1;linear,0.5;cropright,0
ExplanationP2OffCommand=
When a screen uses Together explanations, the metrics for this are the following:
ExplanationTogetherX=SCREEN_CENTER_X
ExplanationTogetherY=SCREEN_CENTER_Y+184
ExplanationTogetherOnCommand=stoptweening;shadowlength,0;zoom,0.75;wrapwidthpixels,(SCREEN_WIDTH*0.9375)*1.25;cropright,1;linear,0.5;cropright,0
ExplanationTogetherOffCommand=stoptweening